I got an urgent phone call from one of my practice managers today, and even though I always love to speak to her (she’s one of those incredibly capable, can-do administrators who is worth her weight in gold at a busy Dallas women’s health clinic) my heart sank when she told me what she needed – she had a cracked ultrasound probe. Again. For the second time this quarter. And it would cost her hundreds of dollars in repair and shipping costs – not to mention the patient downtime – to get it fixed.
After a Skype session with me and our ever-amazing technician, Will La Torre, my practice manager friend was able to identify the damage, brainstorm the problem, and ultimately trace her ultrasound probe performance issues to recent staff changes – the ultrasound technician she had hired in May simply hadn’t had the rigorous training in ultrasound probe use, care, cleaning, and storage that makes the difference between a long-lasting ultrasound probe, and one that needs to be repaired – or even replaced – all too frequently. But my friend in Dallas isn’t alone – the life of your ultrasound probes is literally in the hands of the techs and staff members who come into contact with the equipment.
Given that upwards of 70 percent of the ultrasound service calls we get are probe related, it pays to consider ways to cut down on preventable probe damage.
Don’t put your practice at risk with a probe that produces less than optimal, or even faulty, test results. And don’t waste funds on unnecessary service calls or probe replacements that could have been prevented by a good Ultrasound Probe Management Program.
Make these basic probe damage prevention steps a part of your regular training for new technicians, and go over them every year with your existing staff:
1) Disinfect – Do It The Right Way: Most of us know that disinfecting the probe after every use is crucial, but make sure that your techs follow the manufacturer-specific set of guidelines for proper cleaning of each probe. Disinfecting isn’t a situation where going above the guidelines adds extra protection -- over-disinfecting can damage the tip or lens of the probe, and mar the crystals in the array. This could affect the quality of the image and lead to diagnosis errors. In the case of my friend in Dallas, a thorough over-view of staff disinfection procedures revealed that her new technician was leaving probes in solution too long. Another danger is using the wrong disinfectant solution. You also don’t want to under-disinfect the probe over time. To be on the safe side, follow the OEM’s instructions – to a “T”.
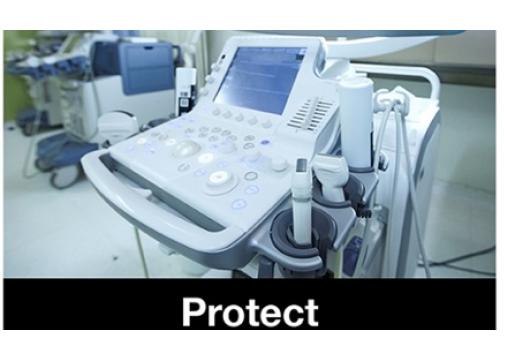
2) Inspect – Regularly and Thoroughly: Damage to an ultrasound probe increases over time. Nicks, holes, cracks, or worn corners allow fluids (I’m talking about gels, disinfectants and, yes, body fluids) to infiltrate the probe. Fluid coming in contact with internal electrical and mechanical assemblies wreaks all kinds of havoc – corrosion starts its inexorable march towards destruction; PCB boards short circuit; crystal arrays break down. For an ultrasound probe, contact with fluid is like letting the enemy camp inside the walls of your fort. And think about this -- cracks and holes also allow the potential for the kind cross-contamination that puts both patient and facility at risk.
So the best way to nip those probe problems in the bud is to visually inspect each probe on a regular basis. Have a schedule, and require your techs to sign off on the inspection, making sure to note any defects: i.e, cracks in the probe case; nicks, holes or worn corners in the lens membrane; cuts or tears in the probe cable or strain relief; bent or missing pins in the connector. Most of these – if found early and dealt with quickly -- are usually repairable. But if they are left unattended, you could end up having to replace the probe altogether.
3) Tuck it In – Don’t Skimp on Storage. One of the great things about ultrasound equipment is that it is mobile – it doesn’t require a hard install, and the machine can be moved from room to room for exams. And … one of the bad things about ultrasound is that it is mobile -- if the probes are not properly stored after each use, they are at risk every time you think they’re safely ‘put to bed’. They can fall from the cart – that’s a sure-fire way to cause significant damage. Dangling cables can be pinched, bent, or run over – a quick way to rack up a few small tears or broken cable wires. So be sure the probes and all cables are neatly and carefully tucked away and secured.
Fortunately, our Dallas clinic practice manager was able to identify the source of her ultrasound probe problems before they became chronic. Yes, she had to deal with some damaged ultrasound probes. Two of them, to be exact. But being the savvy manager she is, she knew that the chances were good that she could send the probes in to us for a repair job – at a fraction of the cost of an out-and-out probe replacement. And she was able to review her operational procedures, and quickly surmise that a proactive probe management plan, with regular training sessions of her technicians on proper probe maintenance and care would significantly reduce defects and performance problems in her ultrasound probes in the future.
This is what we both learned from the experience: Keep those ultrasound probes in prime condition, both for the health of your practice, and the health of your patients.
If you have any questions or would like more information please call 800-722-3646 or contact us!